
Table of Contents
- How to Inspect New Construction Homes: Stage-by-Stage
- Your New Construction Home Inspection Checklist
- Why a Pre-Drywall Inspection Matters Most
- What Buyers Should Bring and Do During the Inspection
- Tests and Measurements That Reveal Hidden Defects
- New Construction Final Walkthrough Checklist
- New Construction Home Warranty Inspection: Your 11-Month Check
- Conclusion: Build Your Inspection Plan Before You Sign
- Frequently Asked Questions
Last Updated: October 7, 2026
How to Inspect New Construction Homes: Stage-by-Stage
Knowing how to inspect new construction homes comes down to one idea: you inspect at three separate stages, not once.
Here is the uncomfortable truth most buyers learn too late: a new build is not finished just because the builder says it is.
The U.S. Department of Housing and Urban Development guidance on home inspections treats a home inspection as a visual review of accessible systems, not a guarantee.
Below, we break down each stage, what to photograph, and the exact questions to ask your builder.
Your New Construction Home Inspection Checklist
A new construction home inspection checklist is a stage-by-stage list of what to look at, when, and what to photograph. It is not one list but three: pre-drywall, final walkthrough, and warranty.
Here is how the three stages compare:
| Stage | When | Main Focus | Who Attends |
|---|---|---|---|
| Pre-drywall | Before insulation and drywall go up | Framing, wiring, plumbing rough-ins, roof structure | Independent inspector, buyer |
| Final walkthrough | Days before closing | Finishes, fixtures, paint, cabinets, flooring | Buyer, builder rep |
| Warranty check | Around month 11 | Settling cracks, HVAC, plumbing, drainage | Inspector, buyer |
A common mistake is treating the final walkthrough as the only inspection. By then, the walls are closed. Framing problems, missing insulation, and rough-in errors are invisible.
Why a Pre-Drywall Inspection Matters Most
The pre-drywall inspection is the most valuable of the three stages, your only chance to see the bones of the house before they disappear. Everything after this point is cosmetic.
When to schedule it
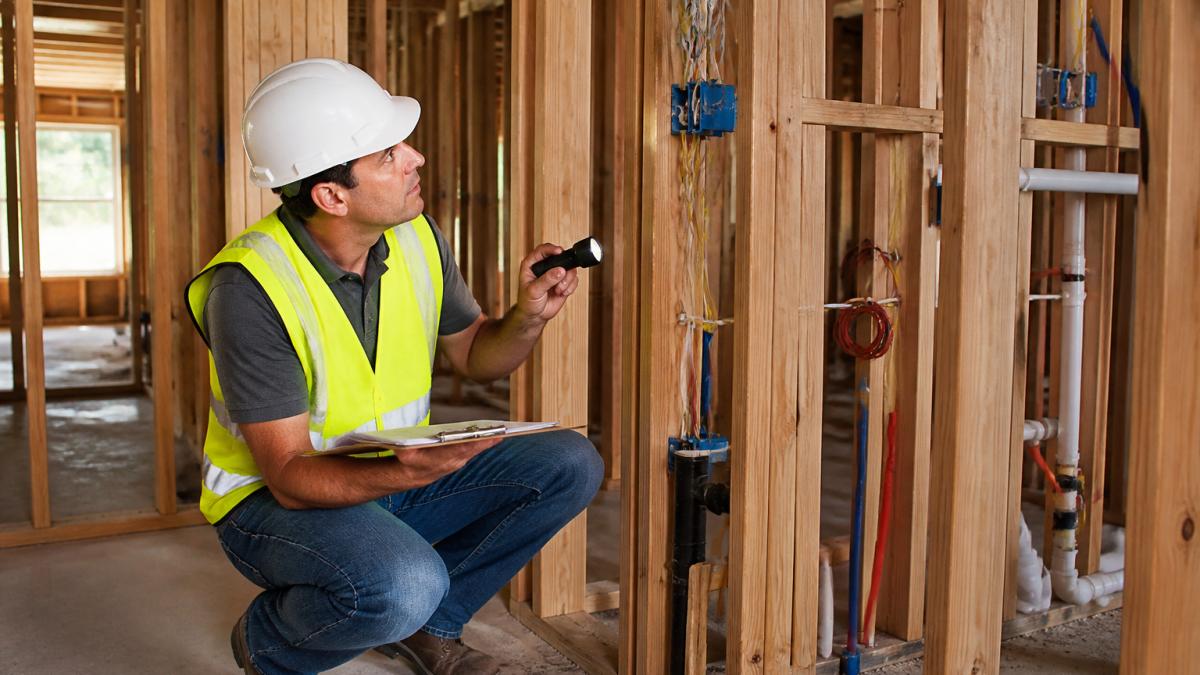
The right window is after the rough-in trades finish, framing, electrical, plumbing, and HVAC ductwork, but before insulation arrives.
Ask your builder's superintendent for the rough-in inspection date as soon as your purchase agreement is signed, and put the request in writing. Builders often notify buyers only a day or two before drywall, not enough time to book an independent inspector.
What the inspector is actually looking at
At this stage, an independent inspector checks:
- Wall and floor framing for straightness, gaps, and proper fastening
- Electrical rough-ins for box placement, wire routing, and panel labeling
- Plumbing lines for correct slope, support, and protection at penetrations
- HVAC ductwork for sealing, support, and routing
- Roof structure and sheathing before shingles cover it
- Window and door framing for square openings and proper flashing
Reconcile the build against the written scope
This is the step most buyers skip. Bring your signed spec sheet, upgrade selections, and floor plan, then walk the frame and confirm what is installed matches what you paid for. Common mismatches include:
- A window where the plan shows a wall, or vice versa
- An outlet missing from a location you specified
- A different HVAC tonnage or duct layout than the upgrade you selected
- A plumbing rough-in in the wrong spot for the fixture you chose
Catching these before drywall is cheap to fix. Catching them after is a negotiation.
Builder access and the independent inspector
What most buyers miss is that the builder's own superintendent is not your inspector. They work for the builder. An independent inspector works for you. That separation is the entire point.
Most production builders allow a third-party inspector on site with advance notice, and many require liability insurance and a site-access waiver. Read your purchase agreement for clauses limiting third-party inspections, some builders restrict them or require their preferred vendor.
What to do with the findings
Ask the inspector for a written report with photos, not just a verbal summary. Send it to the superintendent and request a written response confirming which items will be corrected and when.
If you are relocating from out of state, you cannot easily walk the site yourself.
If you want a broader look at how the three stages fit together, the U.S. Department of Housing and Urban Development guidance on home inspections is a useful starting reference for what a visual inspection does and does not cover.
What Buyers Should Bring and Do During the Inspection
Bring a phone with a full battery, a flashlight, a tape measure, a notebook, and your signed spec sheet. Then stay quiet and let the inspector work. Your job is to document, not to chat.
What you should actually do during the walkthrough:
- Photograph every room, corner, and system, even the ones that look fine.
- Note the date and location of each defect as you see it.
- Ask the inspector to explain anything you do not understand.
- Write down the builder's rep name and any verbal promises.
- Keep every photo in one folder labeled by date.
A common mistake is accepting a verbal fix. "We'll take care of that" means nothing without a written punch list. Get it in the inspection report and in writing from the builder.
Tests and Measurements That Reveal Hidden Defects
Simple tests catch problems the eye misses, and none require special tools beyond a flashlight, a level, an outlet tester, and a small ball. But these checks are observations, not a substitute for specialized testing.
What a standard inspection does and does not include
A standard home inspection is a visual, non-invasive review of accessible systems, the inspector looks at what can be seen without cutting, prying, or dismantling. On a new build, that scope has real limits:
- Concealed work behind drywall is out of scope once the walls are closed
- Code compliance is not the inspector's job, that belongs to the municipal code official who issues the certificate of occupancy
- Destructive testing (cutting drywall, pulling up flooring) is not part of a standard inspection
- Specialized testing, sewer scope, radon, mold, structural engineering, thermal imaging, is a separate service with a separate fee
If you want any of those specialized tests, ask for them explicitly and expect to pay for them separately. A general inspector will tell you when a finding warrants a specialist.
Quick checks you can run yourself
The golf ball test is the classic one. Drop a golf ball on a floor or driveway. If it rolls toward the wall or the street instead of stopping, the surface is not level. On a driveway, that means water will pool instead of draining away.
Other quick checks:
- Level check: Place a level on countertops, shelves, and door frames. Small variations are normal; visible slopes are not.
- Drainage and grading check: Pour a bucket of water on the yard near the foundation. Watch where it goes. Water should move away from the house, not toward it. Look for low spots, exposed foundation, and downspouts that discharge too close to the wall.
- Window check: Open and close every window. They should move smoothly and latch fully. Check that weep holes at the bottom of the frame are clear.
- Outlet check: Plug a small tester into every outlet. Confirm it has power and correct wiring. Test both halves of each receptacle and every GFCI.
- GFCI and AFCI check: Press the test button on each GFCI outlet and confirm it trips. Ask the inspector to confirm AFCI breakers in bedrooms and living areas.
- Door check: Open and close every door. They should not stick or swing on their own.
What to leave to the inspector
Some checks are best left to the professional because the consequences of error are high:
- Electrical panel labeling and breaker sizing
- Gas line leak detection
- Roof flashing and attic ventilation
- Structural connections at framing transitions
A common mistake is testing only the rooms you plan to use most. Check every room, including closets and the garage. Builders fix what you document, and only what you document.
When to call a specialist
If your inspector flags something outside their scope, a possible foundation issue, a drainage concern, a suspected sewer problem, get the specialist out before closing. On a new build, the builder is generally responsible for correcting defects within the warranty period, but the burden of proof is on you. A specialist's written report is the evidence that moves a repair request forward.
New Construction Final Walkthrough Checklist
The final walkthrough happens days before closing. This is your new construction final walkthrough checklist, and it covers finishes, not structure.
Walk through with a critical eye and check:
- Paint touch-ups on walls, trim, and ceilings
- Countertop scratches and chips
- Cabinet doors and drawers for smooth operation
- Flooring for gaps, squeaks, and blemishes
- Every light fixture and switch
- Every faucet and drain for leaks
- Appliances for function and correct installation
This is also called the blue-tape walkthrough, named for the painter's tape buyers use to mark defects. The tape is a starting point, not the finish line, photos and a written list carry more weight.
New Construction Home Warranty Inspection: Your 11-Month Check
A new construction home warranty inspection happens around month 11, just before your first-year warranty expires.
Homes settle. Cracks appear. HVAC systems reveal flaws. Plumbing shows slow leaks.
At this stage, an inspector looks for:
- Cracks in drywall, tile, and concrete
- Doors and windows that no longer close cleanly
- HVAC performance and airflow
- Water stains or signs of leaks
- Grading and drainage issues that appeared over time
You then submit a written repair request to the builder before the warranty window closes.
This is where structured follow-up matters. Our team reimburses third-party home inspections at closing, up to $500.
Conclusion: Build Your Inspection Plan Before You Sign
The biggest risk in a new build is not a bad builder. It is a buyer who inspects once, signs, and hopes. Three stages, clear photos, and written requests are what protect your money.
If you want help comparing builders and reviewing specs, New Home Hub SWFL is built for exactly that.
Explore your options with New Home Hub SWFL and walk into closing with a plan, not a guess.
Frequently Asked Questions
What does a new construction home inspection consist of?
A new construction inspection covers the same major systems as a resale inspection: roof, exterior, foundation, structure, electrical, plumbing, HVAC, insulation, and interior finishes. The difference is timing and access. Inspectors look at exposed framing and rough-ins before drywall goes up, then return for a final walkthrough to check visible components, test outlets and fixtures, and document defects with photos. Some inspectors also run a golf ball test on floors and check grading and drainage around the slab.
Should I get a home inspection on a newly built home?
Yes. A newly built home can have defects that municipal code inspections do not catch because those inspections confirm minimum code compliance, not workmanship or long-term durability. An independent inspector works for you, not the builder, and documents functional issues, safety concerns, and cosmetic problems before your warranty clock runs down. Many builders allow a pre-drywall inspection and a final walkthrough, and an 11-month warranty inspection can catch items before your one-year coverage expires.
When should I schedule inspections during new home construction?
Schedule at least three: a pre-drywall inspection after framing, electrical, and plumbing rough-ins are complete but before insulation and drywall; a final walkthrough inspection a few days before closing; and an 11-month warranty inspection before your first-year warranty ends. Ask your builder for a construction schedule and put these dates in writing. If your builder limits access, request a walkthrough meeting with the superintendent to review the same components yourself.
What is the difference between a home inspection and a blue tape walkthrough?
A blue tape walkthrough is a builder-led punch list where you mark cosmetic issues like paint touch-ups, drywall cracks, cabinet adjustments, countertop scratches, and flooring blemishes with blue tape. A home inspection is an independent evaluation of major systems and visible components by a licensed inspector. The blue-tape walkthrough focuses on finishes; the inspection covers roof, foundation, electrical, plumbing, HVAC, insulation, and structural elements. You need both, and they should happen at different stages.