
Table of Contents
- Why a New Construction Inspection Checklist Matters in 2026
- New Construction Inspection Stages: A Stage-by-Stage Timeline
- The Pre-Drywall Inspection Checklist: What to Verify Before Walls Close
- Exterior, Roof, and Water Management Checks
- The New Construction Final Walkthrough Checklist: Room by Room
- The New Construction Home Warranty Checklist: Your One-Year Inspection
- How to Prioritize Defects, Document Issues, and Verify Builder Repairs
- Inspection Costs, Scope Limits, and What Your Contract Actually Covers
- Frequently Asked Questions
Last Updated: October 19, 2026
Why a New Construction Inspection Checklist Matters in 2026
A new construction home inspection checklist is a stage-by-stage record of what to verify in a newly built house before, during, and after construction, covering structure, systems, finishes, and site drainage, which is why every buyer should keep a new construction home inspection checklist on hand. A new build is not a used home with a fresh coat of paint.
Here is the part most buyers get wrong: they treat the final walkthrough as the inspection. It isn't. The defects that cost the most to fix, foundation, framing, and rough-in work, are sealed behind drywall weeks before that walkthrough happens. Miss them and you inherit them.
Below, we walk through every stage, from pre-drywall to the one-year warranty visit, with the specific checks that matter at each one. The U.S. Department of Housing and Urban Development guide to home inspections is a useful primer on what a general inspection does and does not cover.
New Construction Inspection Stages: A Stage-by-Stage Timeline
New construction inspections follow four stages: pre-drywall, pre-closing final walkthrough, a 30-day punch list review, and the one-year warranty inspection. Each stage catches a different class of defect, and skipping one means paying for it later. What most checklists leave out is the timing logic: every stage has a window, and once that window closes, a class of defects becomes invisible or expensive to fix.
| Stage | When to Book | What Becomes Concealed Afterward | Primary Focus |
|---|---|---|---|
| Pre-pour (foundation) | Before the slab or stem wall is poured | Footings, rebar placement, anchor bolts, under-slab plumbing | Foundation geometry, reinforcement, moisture barrier |
| Pre-drywall | After rough-in, before insulation and drywall | Framing connections, wiring routing, pipe supports, duct sealing | Structure, electrical, plumbing, HVAC rough-in |
| Final walkthrough | Before closing, after finishes | Nothing yet, but defects get harder to attribute to the builder after you take possession | Finishes, appliances, systems operation, punch list |
| 30-day review | About a month after move-in | Settlement behavior under real occupancy | Cracks, doors, trim, minor system issues |
| One-year warranty | Month 11 of the warranty period | Long-term structural movement and water intrusion | Structural movement, water intrusion, system failures |
What Gets Sealed at Each Stage
The pre-pour inspection is the only chance to see footing depth, rebar spacing, anchor bolt placement, and under-slab plumbing before concrete covers them. A missing anchor bolt or a misplaced sleeve cannot be corrected later without cutting concrete. The pre-drywall inspection is the last look at framing, wiring, pipe supports, and duct joints; once insulation and drywall go up, those systems are only inspectable by opening walls.
How to Schedule Around Builder Timelines
Builders run tight trade schedules, and inspection windows are short. A common pattern is that the pre-drywall window opens and closes within a few days. Book your inspector as soon as the contract is signed, and put the booking in writing. Naming inspection dates and notice requirements in the purchase contract is the difference between a real inspection and a rushed one.
The Pre-Drywall Inspection Checklist: What to Verify Before Walls Close
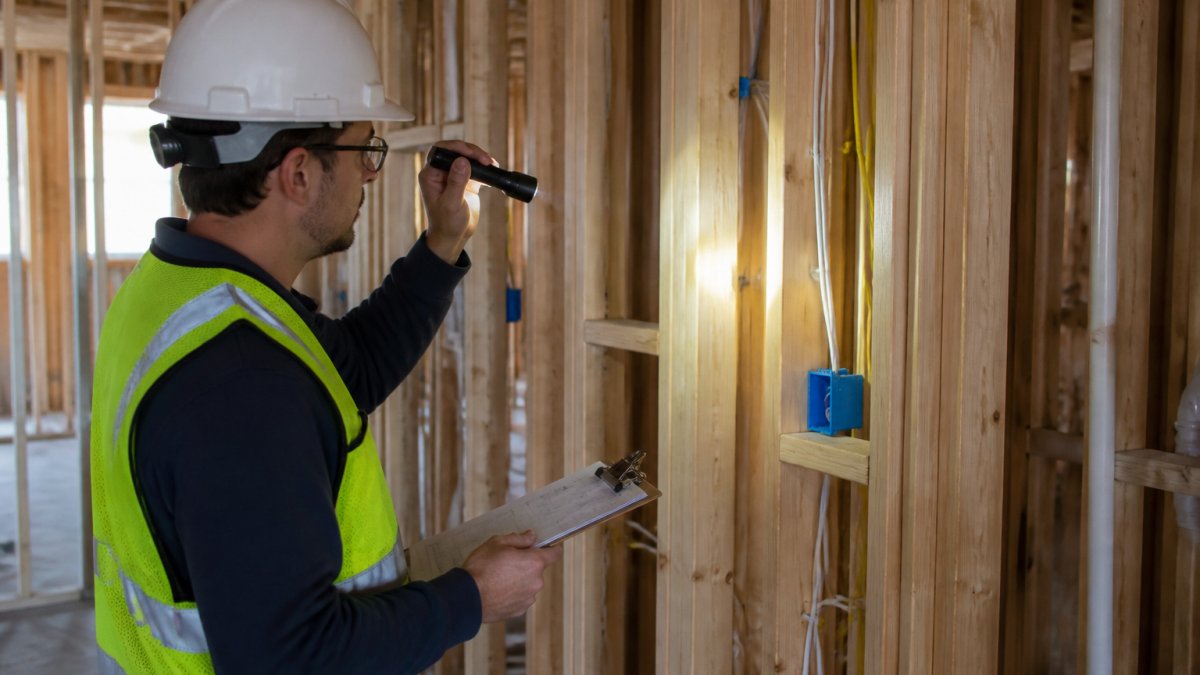
The pre-drywall inspection is the highest-value check in the entire build. At this stage, framing, wiring, pipes, and ducts are all visible, so defects are cheap to fix and easy to document.
Foundation, Framing, and Structural Components
Walk the foundation for cracks, honeycombing, and improper curing. Check that anchor bolts connect framing to the slab or stem wall. Inside, look for bowed studs, missing blocking, and gaps where structural components meet. Confirm the building design matches the approved plans, since substitutions happen quietly.
Rough-In Electrical, Plumbing, and HVAC
Verify outlet and switch placement against the plan, check that wiring is secured and properly routed, and confirm plumbing lines are supported and leak-free at test pressure. For HVAC, check duct sealing, return air paths, and that ventilation runs where specified. The U.S. Department of Energy guidance on home ventilation explains why duct sealing affects both comfort and air quality.
Exterior, Roof, and Water Management Checks
Water is the most common enemy of a new home, and most of the defenses against it are installed outside. Inspect the exterior envelope before finishes hide the details.
Roof, Attic, and Crawlspace
Check roof shingles for alignment and proper flashing at valleys, vents, and chimneys. In the attic, confirm insulation coverage, ventilation, and no daylight showing through the roof deck. In a crawlspace, look for standing water, vapor barrier coverage, and proper grading beneath the floor.
Grading, Drainage, and Water Intrusion
The ground should slope away from the foundation on every side. Look for downspouts that discharge too close to the walls, low spots that hold water, and missing swales. Water intrusion rarely announces itself at first; it shows up as staining and musty smells months later.
The New Construction Final Walkthrough Checklist: Room by Room
The new construction final walkthrough checklist is your room-by-room pass through the finished house, testing everything from outlets to appliances and documenting every defect on a written punch list. Bring a notebook, a phone charger, and a level.
Interior Finishes, Trim, Floors, Walls, and Ceilings
Check walls and ceilings in raking light for drywall seams, nail pops, and uneven texture. Run a hand along trim for gaps, and check that floors are level and free of squeaks. Open and close every door and window, confirming latches, alignment, and exit points that open freely.
Kitchen, Bathrooms, and Appliances
Test every appliance through a full cycle. Run faucets and check under sinks for leaks, flush toilets, and confirm GFCI outlets trip and reset in kitchens, bathrooms, and the garage. Check caulking and grout in wet areas, and confirm ventilation fans actually exhaust outside.
| Room | What to Test | Pass/Fail |
|---|---|---|
| Kitchen | Appliances, GFCI outlets, faucet, under-sink leaks | ☐ Pass ☐ Fail |
| Bathrooms | Toilets, drains, caulk, exhaust fan | ☐ Pass ☐ Fail |
| Bedrooms | Doors, windows, outlets, floors | ☐ Pass ☐ Fail |
| Garage | GFCI, door operation, slab cracks | ☐ Pass ☐ Fail |
The New Construction Home Warranty Checklist: Your One-Year Inspection
The new construction home warranty checklist is a documented inspection performed near the end of your first year, when structural settling and system defects are most likely to surface. Schedule it at month 11 so you have time to submit claims before the warranty window closes.
Walk the home the way you did at closing, then add the long-term checks: cracks wider than a hairline in walls or slab, doors that no longer latch, water stains near windows or in the attic, and HVAC or plumbing performance that has drifted. The Federal Trade Commission guidance on home warranties explains what warranty coverage typically includes and what it excludes.
How to Prioritize Defects, Document Issues, and Verify Builder Repairs
Prioritize defects in three tiers: safety and structural first, water intrusion second, cosmetic last. A missing handrail or exposed wiring outranks a paint scuff every time.
Document every defect with a photo, a location, and a short description, then submit it as a written punch list. When the builder reports a repair complete, verify it yourself rather than taking a verbal confirmation.
Inspection Costs, Scope Limits, and What Your Contract Actually Covers
Inspection costs vary by market, home size, and how many stages you book, so ask each inspector for a written quote rather than assuming a figure. As a planning range, buyers commonly see a few hundred dollars for a single-stage inspection on a typical new home and a bundled multi-stage package priced below the sum of the individual visits; the exact figure depends on square footage, foundation type, and travel.
What a General Inspection Does and Does Not Cover
A general inspection is visual and non-invasive. It does not open walls, test every circuit under load, or guarantee code compliance. Building code enforcement is handled by your local permitting authority, and code compliance is not the same as quality workmanship, a home can pass code and still have defects an inspector would flag. Specialized testing, such as sewer scope, radon, mold, or engineered structural review, is usually a separate service with a separate fee.
How Inspection Findings Become Repair Requests
Your purchase contract, not the inspection report, defines what the builder must fix. Most new-build contracts include a repair-request window and a defined process for submitting items, and some limit repairs to code-compliance items or specified tolerances. Read those clauses before your final walkthrough. When you submit a punch list, tie each item to a photo, a location, and a short description, and reference the contract clause or specification it violates where you can.
New Home Hub SWFL reviews builder contracts and specifications with buyers so the warranty terms and repair obligations are clear before signing, and the company reimburses third-party inspection costs at closing up to $500.
Frequently Asked Questions
Do new construction homes really need an independent inspection?
Yes. A municipal code inspection confirms the builder met minimum building code, but it does not protect your interests or document workmanship defects. An independent inspector works for you and produces a written inspection report you can use to request repairs. Many buyers schedule at least three: pre-drywall, final walkthrough, and a one-year warranty inspection. If your builder offers a third-party inspection reimbursement, confirm the terms in writing before you close.
When should you schedule each new construction inspection stage?
Book the pre-drywall inspection after framing, electrical, plumbing, and HVAC rough-in are complete but before insulation and drywall go up. Schedule the final walkthrough within a few days of your closing date, after the home is substantially complete. The one-year warranty inspection happens about 11 months after closing, before your warranty window closes. Ask your builder for the construction schedule early so you can reserve an inspector before each stage arrives.
What should be on a pre-drywall inspection checklist?
A pre-drywall inspection checklist should cover foundation and slab condition, framing alignment and bracing, window and door rough openings, electrical panel and wiring placement, plumbing line routing and pressure testing, HVAC ductwork and returns, and any penetrations that could allow water intrusion. Photograph every wall cavity before drywall covers it. Those photos become your reference if a leak or wiring issue appears later, and they help you document defects clearly in your inspection report.
What should I bring to a new construction final walkthrough?
Bring your signed contract and written specifications, your inspection report from earlier stages, a phone or camera for photos, a phone charger to test outlets, a small level, and a notebook for your punch list. Test every faucet, toilet, appliance, window, door, and GFCI outlet. Note cosmetic defects like trim gaps, floor scratches, and paint touch-ups. Get a signed completion date for each punch list item before you accept the keys.
What should I do if the inspector finds problems in a new home?
Ask the inspector to rank each defect by severity so you know what must be fixed before closing versus what can wait. Submit the inspection report to your builder in writing and request a repair schedule with dates. Photograph the repairs when they are complete and confirm they match the report. For structural, safety, or water intrusion issues, do not close until they are resolved. Keep copies of every email and signed acknowledgment for your warranty file.
How long does a new construction home inspection take?
A pre-drywall inspection typically takes two to three hours because the inspector is checking framing, rough-in systems, and structural components before walls close. A final walkthrough inspection on a completed home usually runs three to four hours depending on square footage. A one-year warranty inspection takes a similar amount of time. Plan to attend in person so you can ask questions and see issues firsthand.